Making the decision to donate your eggs is a remarkable act of kindness that can help others realize their dreams of starting a family. Whether you’re motivated by altruistic reasons, financial compensation, or a combination of both, proper preparation can help ensure a smooth and successful donation process. This guide will walk you through everything you need to know to prepare for your egg donation appointment.
Understanding Your Eligibility
Before starting your journey as an egg donor, you’ll need to meet certain requirements. The ideal candidate should be between 21 and 31 years old and in good overall health. Your BMI should fall below 28, and you should maintain a smoke-free lifestyle in a non-smoking household. The clinic will need to verify that you have no history of substance abuse or sexually transmitted diseases. They’ll also check that you don’t have any inheritable genetic abnormalities or a history of miscarriages. These requirements help ensure the best possible outcome for both you and the intended parents.
Pre-Donation Medical Screening
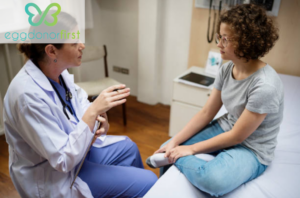
Your journey begins with a thorough medical screening process. You’ll need to complete a comprehensive physical examination to assess your overall health. A gynecological check-up will evaluate your reproductive health. The clinic will also conduct blood and urine tests to screen for any potential health concerns. During this time, you’ll discuss your family’s medical history in detail with the medical team. Take time to gather as much information as you can about your family’s health background – it’s an essential part of ensuring a successful donation process.
Preparing for the Medication Phase
After passing your initial screening, you’ll move into the medication phase. Here’s how to prepare for this important step:
1. Creating Your Medication Schedule
Set specific times each day for taking your fertility medications. Consider using a calendar or phone app to help you stay on track. Store all your medications in a cool, dry place away from direct sunlight. If you need to give yourself injections, take time to learn the proper technique from your medical team. Don’t hesitate to ask questions until you feel completely comfortable with the process.
2. Making Lifestyle Adjustments
Focus on eating a balanced diet rich in proteins and vegetables to keep your body strong. Make sure you’re drinking plenty of water throughout the day. Get enough sleep each night to help your body respond well to the medications. Cut back on alcohol and caffeine during this time. While it’s good to stay active, stick to gentle exercise and avoid any strenuous activities that might put stress on your body.
The Day Before Your Retrieval
1. Physical Preparation
Follow your clinic’s fasting instructions carefully. Make sure you’ve arranged for someone to drive you to and from the clinic – you won’t be able to drive after the procedure. Pick out comfortable clothes that are loose-fitting and easy to change in and out of. Take off any nail polish and remove all jewelry before the procedure. Skip wearing perfume or scented products on the day of retrieval.
2. Mental Preparation
Try to get a full night’s sleep to help you feel refreshed and ready. If you’re feeling nervous, practice some deep breathing or meditation techniques. Write down any last-minute questions you have for your medical team. Remember, it’s perfectly normal to feel a mix of emotions at this point.
What to Bring to Your Appointment
Pack a small bag the night before with everything you’ll need. Bring your ID and any paperwork the clinic has requested. Include your insurance information if it’s needed for the procedure. Pack a pair of warm, comfortable socks since medical facilities can be chilly. Throw in a light sweater in case you get cold. Bring something to keep you entertained during waiting periods, like a book or tablet. Pack some light snacks for after the procedure, and don’t forget a water bottle to stay hydrated.
Understanding the Retrieval Process
The egg retrieval procedure itself is relatively quick, typically taking about 15 minutes. You’ll receive sedation, so you won’t feel any discomfort during the process. Your doctor will use a tiny needle to carefully retrieve the eggs from your ovaries. The whole process is precise and well-monitored by your medical team.
Post-Retrieval Recovery
After your procedure, plan to take it easy for the rest of the day. You might experience some mild cramping, similar to what you’d feel during your period. Don’t be surprised if you notice some light spotting – this is completely normal. Some women feel bloated or experience slight discomfort, but these symptoms typically fade quickly. Most donors return to their normal activities within a day or two. Make sure to follow all the post-procedure care instructions from your clinic carefully.
Managing Expectations
Remember that you’re in good hands throughout this process. Your medical team has extensive experience with egg donation and will monitor you closely. While you might feel some discomfort, it’s usually minimal and temporary. You’re making an incredible difference in someone’s life – your generosity will help create a family for someone who couldn’t have children otherwise. The clinic staff is there to support you every step of the way, so don’t hesitate to reach out with questions or concerns.
Final Thoughts
Egg donation is truly a generous act that helps create families for those who cannot conceive on their own. While the process requires commitment and careful preparation, understanding what to expect can help ease any worries you might have. Remember that you’re working with experienced medical professionals who will guide you through each step of the journey.
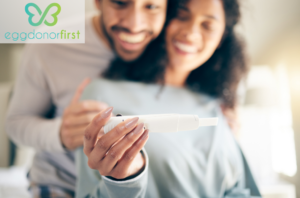
Your contribution means more than just the monetary compensation – you’re helping make someone’s dream of parenthood come true. Take pride in knowing that your preparation and dedication to this process will have a lasting impact on another family’s life. It’s a beautiful way to help others while being part of something bigger than yourself.